Why Your Home Needs a Guest Wi-Fi Network (and How to Set One Up)
Every person you hand your Wi-Fi password to gets a master key to everything on your network — your laptop, your files, your smart TV, the baby monitor. Your router has a built-in feature that fixes this in about ten minutes, and almost nobody turns it on. Here’s why you should, and exactly how.
Think about what happens at your house the next time friends come over for dinner. Someone asks for the Wi-Fi password, you read out the string of characters taped to the side of the router, and four phones connect. Harmless, right? Mostly, yes. But that password doesn’t just grant internet access — it puts those phones inside the same fenced yard as your work laptop, the desktop with your tax PDFs, your network printer, your security cameras, and every smart bulb and thermostat you own. Anything on the same network can, at least in principle, see and talk to everything else on it. Most of the time nothing bad happens, because your friends are your friends. But their phones carry apps you’ve never heard of, their kids’ tablets have whatever was clicked last week, and the cheap smart plug you bought from a brand that no longer exists is quietly running firmware from 2021. A guest Wi-Fi network is the simple, built-in answer to all of this: a second, separate network that shares your internet connection but shares nothing else. Visitors get fast Wi-Fi. Your devices stay behind a locked door. And it takes about ten minutes to set up on basically any router sold in the last decade.
What a Guest Network Actually Is
Same internet pipe, separate rooms
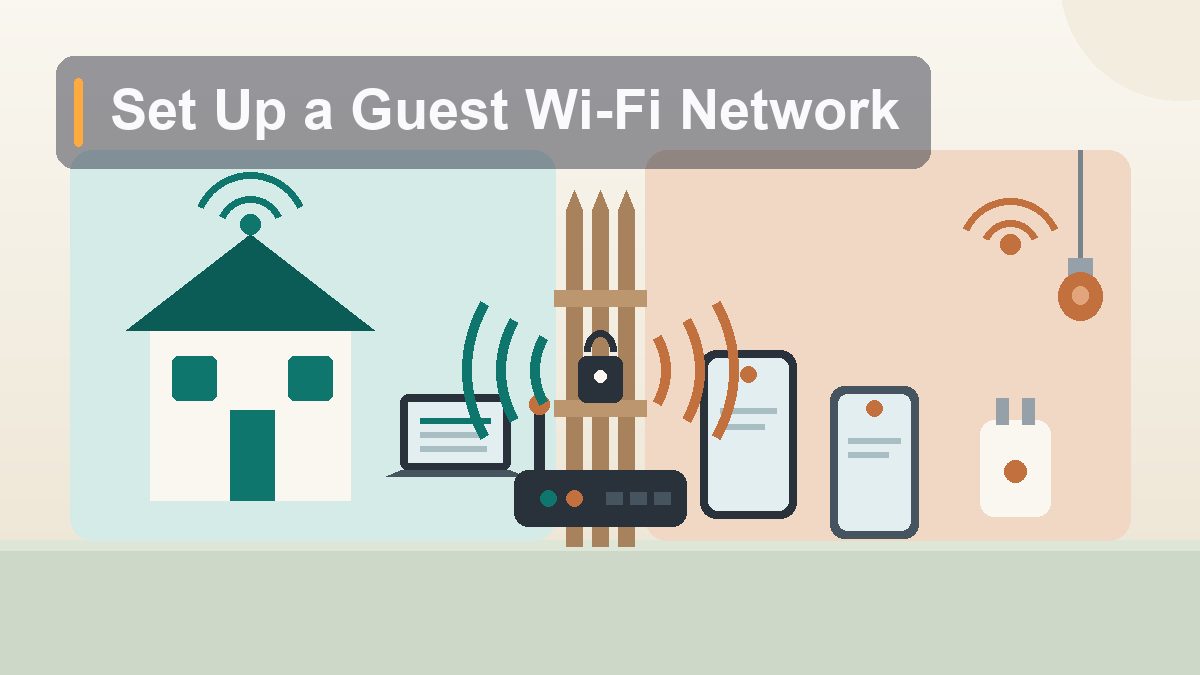
A guest network is a second Wi-Fi network broadcast by the same router you already own. It has its own name (SSID) and its own password, but it uses the same internet connection, the same radios, and the same hardware. When a device joins the guest network, it gets an IP address from a separate pool and — this is the important part — it is walled off from your main, private network. Devices on the guest side can reach the internet and nothing else. They cannot see your laptop, cannot browse the shared folder on your desktop, cannot print to your printer, and cannot poke at your smart thermostat.
The analogy I keep coming back to is a restaurant versus your kitchen. Your main network is your kitchen: everything you care about lives there, and only family should be rummaging around in it. The guest network is the dining room. Guests sit there, they’re served the same food — the same internet connection, at full speed — but the swinging door to the kitchen stays closed. Nobody feels insulted, nobody goes without, and your knives stay where you left them.
Under the hood, routers accomplish this with a feature often labeled AP isolation or client isolation (more on that below), plus a separate subnet and firewall rules that block traffic between the guest network and your private one. You don’t need to understand any of that to use it. You need to find one checkbox in your router’s settings, pick a name and a password, and click save. Every router brand covered in this guide has shipped this feature for years — Netgear, TP-Link, Linksys, Asus, Eero, Google and Nest Wifi, and the gateways your internet provider rents you. If your router is less than ten years old, the feature is already there, waiting.
Why It Matters More Than People Think
The problem isn’t your friends — it’s everything attached to their phones
The polite case for a guest network is obvious: convenience and boundaries. You can hand out the guest password freely without mentally auditing who’s had your main password over the years. You can change the guest password after a party without reconnecting your own twenty-three devices. You can give the babysitter, the contractor, and the house-sitter internet access without giving them anything else. When the relationship ends — the contractor finishes, the ex-roommate moves out — you change one password that affects exactly zero of your own devices.
But the security case is stronger, and it’s less about malicious dinner guests and more about three quieter risks.
First, compromised devices. Phones and laptops get infected with malware through sketchy apps, poisoned ads, and phishing links. It happens to careful people. If a friend’s infected laptop joins your main network, some malware actively scans the local network looking for other machines to attack — old Windows shares, printers with default passwords, network storage drives. On a guest network, that scan finds a brick wall. The infected device can still reach the internet (and get cleaned), but your devices are simply invisible to it.
Second, your password stops being a secret. Every phone that joins your Wi-Fi stores the password and can share it — Android has a literal “share Wi-Fi” QR code button, and iPhones offer to share with nearby contacts. The password you gave one person in 2022 may now live on a dozen devices you’ve never met. A guest network turns that sprawl into a non-issue, because the only password floating around unlocks a network with nothing on it.
Third — and this is the big one — your smart home gadgets. We’ll spend a whole section on this, because for most households it’s the most compelling reason of all.
The Smart Home Problem: IoT Devices Belong in Quarantine
Your lightbulb does not need to talk to your laptop
Here’s an uncomfortable truth about the modern smart home: the average household now has more internet-connected devices run by random hardware companies than devices run by companies with serious security teams. Your laptop gets security updates for a decade. Your phone, five to seven years. Meanwhile, that discounted video doorbell, the no-name smart plug, the Wi-Fi-enabled air purifier, and the robot vacuum are all running software maintained — if you’re lucky — by a small team you’ll never hear from, and they sit on your network with a direct view of everything else on it.
Security researchers have been documenting for years what happens next. Cheap Internet-of-Things devices ship with hardcoded passwords, unpatched vulnerabilities, and update mechanisms that silently stop working when the company folds or loses interest. Botnets with names like Mirai built their empires almost entirely out of hijacked cameras, doorbells, and routers. And even when a gadget isn’t hostile, it’s often chatty — many IoT devices send telemetry to servers overseas and scan their local network neighborhood, because that was easier for the manufacturer than doing it properly.
The guest network is the standard, zero-cost fix. Move every smart home gadget onto the guest network and suddenly the blast radius of a compromised device shrinks to almost nothing. The robot vacuum can still reach its cloud service, the doorbell still streams video to your phone over the internet, the smart plug still responds to its app. But none of them can see your laptop, your NAS drive, or your work machine anymore. If one of them is ever hijacked, it’s trapped alone in the dining room.
Some smart home ecosystems expect your phone and the gadget to be on the same network for local control — certain Chromecast and AirPlay setups, some older smart speakers, and a few hub-less devices fall into this category. If a device stops responding to its app after you move it to the guest network, that’s usually why. The fixes, in order of preference: check whether the device works fine through its cloud connection anyway (most do, with a barely noticeable delay), look for a router setting that allows limited guest-to-main communication for specific devices, or keep that one device on the main network and move the rest. Don’t let one fussy Chromecast stop you from quarantining the other thirty gadgets.
How to Turn It On: Router by Router
The exact menu path for the big brands
The steps below cover the routers most common in US and Canadian homes. One universal note first: you’ll either do this in the router’s smartphone app or in a browser by visiting the router’s admin address — typically 192.168.1.1, 192.168.0.1, or an address printed on the sticker underneath the unit. If you’ve never logged into your router, the default admin username and password are on that same sticker (and if they’re still set to the factory defaults, change the admin password while you’re in there — that’s arguably more urgent than the guest network).
Netgear (Nighthawk and Orbi)
Open the Nighthawk or Orbi app and tap Wi-Fi Settings or Guest Wi-Fi, then enable the guest network and set a name and password. On the web interface (routerlogin.net), go to Advanced > Guest Network. Netgear gives you useful options here: you can enable the guest network on 2.4 GHz, 5 GHz, or both, and there’s a checkbox labeled “Allow guests to see each other and access my local network” — leave that unchecked. Unchecked is the whole point.
TP-Link (Archer and Deco)
In the Tether app or the web interface at tplinkwifi.net, look for Guest Network under Wireless settings (on Deco mesh systems, it’s a top-level option in the app). Enable it, name it, set the password. TP-Link also offers a neat extra on many models: a scheduling option that turns the guest network on and off automatically — handy if you only want it active on weekends or during a rental. On Deco, there’s an “IoT Network” option that is essentially a purpose-built guest network for smart gadgets; use it.
Linksys
In the Linksys app, tap the menu and choose Guest Access, toggle it on, and set the name and password. Linksys handles isolation automatically — guest devices can’t touch your main network, full stop. One Linksys quirk worth knowing: on some models, guest devices are shown a captive portal where they enter the password in a browser page instead of at the Wi-Fi prompt. It looks unusual but works fine, and the app will show you exactly what to tell your guests.
Asus
Asus exposes the most knobs, in the web interface at router.asus.com under Guest Network. You can create up to three separate guest networks per band, each with its own name, password, and rules. The setting that matters is Access Intranet — set it to Disable so guests can’t reach your local devices. Asus also lets you set time limits on guest networks and, on newer firmware, create a dedicated “IoT network” profile with simpler settings for fussy smart gadgets. If you like control, Asus is the brand that gives it to you.
Eero
Eero keeps it minimal: in the app, go to Settings > Guest Network, toggle it on, and set a name and password. That’s the entire process. Eero’s guest network is isolated by design — guest devices get internet and nothing else, and there are no extra settings to get wrong. Eero also supports Amazon’s “eero Built-in” and HomeKit-style integrations that automatically steer smart devices sensibly, but the guest toggle alone does the core job.
Google Wifi and Nest Wifi
In the Google Home app, tap Wi-Fi > Settings > Guest network, turn it on, and set the name and password. Google’s take is characteristically thoughtful: after enabling the guest network, you can optionally choose specific devices from your main network — a Chromecast, a Nest speaker, a printer — that guests are allowed to reach. That gives you the isolation by default with a small, deliberate list of exceptions, which is exactly the right model. Guests can cast to your TV without being able to see your laptop.
ISP gateways (Xfinity, Spectrum, AT&T, Bell, Rogers, and friends)
If you’re using the combination modem-router your provider supplied, the guest network setting is in the provider’s app or the gateway’s admin page: Xfinity users look in the Xfinity app under Wi-Fi settings for a guest option (older gateways expose it at 10.0.0.1); Spectrum’s routers have it under the router’s web interface; AT&T’s gateways historically lack a true guest network on many models — check yours at 192.168.1.254. If your ISP gateway genuinely doesn’t offer the feature, you have two good options: put the gateway into bridge mode and add your own router (the better fix, and a nice upgrade generally), or pick up an inexpensive mesh system and let it handle Wi-Fi entirely.
| Router brand | Where the setting lives | Isolation behavior |
|---|---|---|
| Netgear (Nighthawk / Orbi) | App: Guest Wi-Fi · Web: Advanced > Guest Network | Leave “access my local network” unchecked |
| TP-Link (Archer / Deco) | Tether/Deco app > Guest Network (Deco also has an IoT Network) | Isolated by default; optional scheduling |
| Linksys | Linksys app > Guest Access | Automatic; some models use a browser login page |
| Asus | router.asus.com > Guest Network (up to 3 per band) | Set “Access Intranet” to Disable |
| Eero | App > Settings > Guest Network | Always isolated; no extra options |
| Google / Nest Wifi | Google Home app > Wi-Fi > Guest network | Isolated by default, with optional shared devices |
| ISP gateway | Provider app or admin page (varies) | Varies; some AT&T models lack the feature entirely |
Naming It and Passwording It
Boring names win; fresh passwords win bigger
Two small decisions, both with more nuance than they look.
The name (SSID). Pick something neutral and clearly separate from your main network — “Maple Street Guest” or “The Johnsons — Guests.” Two rules. First, don’t put personal information in any Wi-Fi name: your full name, your exact address, or “TheSmithFamilyAt402” tells anyone scanning from the street exactly whose network it is. Second, make it visually distinct from your main network’s name so your own family never joins the wrong one by accident. If your main network is “Falcon,” name the guest one “Falcon Guest,” not “Falcon-2” — the word “Guest” prevents a whole category of confusion, including your own laptop quietly camping on the isolated network and losing access to the printer.
The password. The guest password should be different from your main password, easy to say out loud, and easy to type on a phone. This is the rare situation where a memorable passphrase beats a random string: something like “porch-light-ember-42” is genuinely strong — length does the heavy lifting — and you can read it across a room without spelling it. Resist the urge to make it a joke that expires or a reference you’ll have to explain. And absolutely do not reuse your main Wi-Fi password “just this once,” because then the guest network protects nothing: anyone holding the shared password also holds the real one.
One more habit worth building: rotate the guest password once or twice a year, or after any large gathering. On most routers this takes ninety seconds, and because none of your own devices use the guest network (except the IoT gadgets, if you’ve moved them — update those at the same sitting), the rotation costs you nothing. Old passwords accumulate on old phones; rotation quietly retires them all.
Client Isolation: The Checkbox Most People Skip
Keeping guests separate from each other, not just from you
There’s a second layer of protection hiding in some routers’ guest settings, and it’s worth understanding even if your router handles it automatically. AP isolation — also called client isolation or station isolation — prevents devices on the same network from communicating with each other at all. With it on, two laptops on your guest network can both reach the internet but can’t see each other, your cousin’s tablet can’t see your neighbor’s phone, and a single compromised guest device can’t attack the other guests.
Think back to the restaurant analogy: without client isolation, all your guests sit at one big communal table and can reach each other’s plates. With it, every guest gets a private booth. For a home network, booth seating is what you want — there’s essentially no legitimate reason for your visitors’ devices to talk to each other.
How the brands handle it: Eero, Google/Nest Wifi, and most ISP gateways isolate guest clients from the main network automatically and generally isolate them from each other as well, with no setting to worry about. Netgear exposes it as that “allow guests to see each other” checkbox (leave it unchecked). Asus gives you per-guest-network intranet controls. TP-Link varies by model — look for “Allow guests to access each other” and turn it off. If your router’s guest settings have any checkbox with the words “local network,” “intranet,” or “each other,” the safe answer is always the one that says no.
If you run an Airbnb or similar, a guest network isn’t optional equipment — it’s table stakes. Give it the password in the welcome book, keep client isolation on (strangers’ devices should never see each other), and consider a router that supports bandwidth limits per network so one guest’s torrent habit doesn’t eat the connection. Rotate the password on a schedule, and never, ever hand out your main network credentials — the network your own phone and laptop use should stay invisible to everyone but you.
Common Snags and How to Fix Them
Five minutes of troubleshooting, usually
“My smart speaker stopped working after I moved it to the guest network.” Almost always a same-network control issue, as covered above. Test whether the app still controls it over the cloud (give it thirty seconds to reconnect), and if not, either move that one device back or check for a router setting that permits specific devices across the boundary — Google Wifi’s shared-devices list handles exactly this.
“Guests say the network disappears upstairs.” The guest network broadcasts from the same radios as your main one, so its range is identical — if it’s weak upstairs, your main network is weak upstairs too, and the fix is a mesh system or a relocated router, not a settings change.
“My printer/camera/NAS doesn’t show up anymore.” Then your phone or laptop is connected to the guest network. This is the single most common guest-network complaint, and the fix is always the same: check which network your own device joined, and forget the guest network on your personal devices so they never auto-join it again.
“I can’t find the setting at all.” Update the router’s firmware first — guest network support was added to some models years after launch. Still missing? You’re probably on an ISP gateway without the feature, and the bridge-mode-plus-own-router path above is the answer. Honestly, that upgrade tends to fix three other annoyances at the same time.
The Ten-Minute Setup, Start to Finish
Do it tonight, in this order
Here’s the whole project, condensed:
- Find your router’s app or admin page (the sticker on the router tells you the address and default login).
- Change the router’s admin password if it’s still the factory default — thirty seconds, big win.
- Enable the guest network; on dual-band routers, enable it on both bands.
- Name it something neutral with the word “Guest” in it, and give it a long, speakable passphrase that’s different from your main password.
- Set every isolation option to the most restrictive choice: no access to your local network, no guest-to-guest communication.
- Connect your smart home gadgets — plugs, bulbs, cameras, vacuum, doorbell — to the guest network, a room at a time. Test each as you go.
- On your own phones and laptops, forget the guest network so they never join it accidentally.
- Write the guest password on a card in the kitchen drawer, and put a reminder in your calendar to rotate it in six months.
That’s it. Ten minutes, no new hardware, no subscription, no ongoing maintenance beyond the occasional password rotation. In exchange, every future visitor gets frictionless internet, your smart gadgets move into quarantine where they belong, and the password taped to your router stops being a skeleton key to your digital life. Of all the security upgrades available to a normal household, this one has the best ratio of effort to payoff I’ve ever found — and it’s been sitting in your router’s settings menu, unused, the whole time.
Menu paths above reflect current apps and firmware as of August 2026; manufacturers shuffle their menus occasionally, but the setting is always named “Guest Network,” “Guest Wi-Fi,” or “Guest Access.” If your router model differs, searching the manufacturer’s support site for your model number plus “guest network” will land you on the exact page.