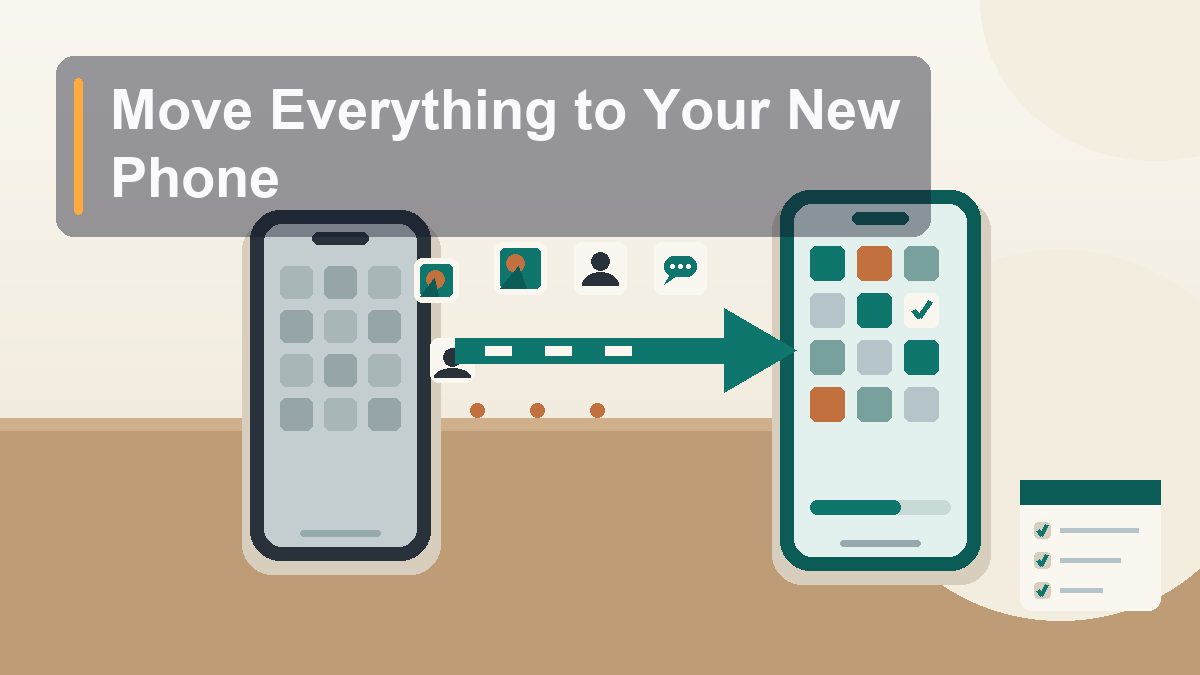
How to Transfer Everything to Your New Phone
Unboxing a new phone is the fun part. The hour after — when you’re staring at an empty home screen wondering where your photos, your chats, and your two-factor codes went — is not. Here’s how to move everything over cleanly, in every direction, and what to double-check before you wipe the old one.
A neighbor of mine upgraded his phone on a Friday evening, did what the carrier store rep told him to do — “just sign in, it all syncs” — and by Saturday morning he’d factory-reset the old phone and listed it for sale. That’s when he discovered that his authenticator app, the one generating login codes for his email, his bank, and his work accounts, lived only on the old device. His WhatsApp history, four years of family photos exchanged in group chats, went with it. The photos in his camera roll were fine — those were in the cloud — but the stuff that wasn’t syncing turned out to be the stuff that mattered most. He spent the better part of two weeks on recovery flows with a dozen services. The frustrating thing is that every one of those losses was avoidable, because phone-to-phone transfer in 2026 is genuinely good — better than it’s ever been — as long as you know which parts happen automatically and which parts absolutely, stubbornly do not. This guide covers all four moves: iPhone to iPhone, Android to Android, and the two cross-platform jumps, plus the short list of things you must handle by hand.
Before You Touch Anything: The Fifteen-Minute Prep
Do this on the old phone while you still have both
Every transfer method works better if you spend a quarter of an hour preparing. None of this is exciting; all of it prevents the classic disasters.
- Charge both phones above 50%, or better, keep them both plugged in. A transfer that dies at 80% can leave the new phone in a weird half-configured state.
- Connect both to the same fast Wi-Fi network. Some methods create their own direct connection, but iCloud and Google account restores lean on your home Wi-Fi, and you don’t want 40 GB of photos trickling through a weak signal in the kitchen.
- Update the old phone’s software first. Quick Start and Move to iOS both behave noticeably better when the outgoing device is on a recent OS version. Yes, updating a phone you’re about to retire feels silly. Do it anyway.
- Know your passwords. You’ll need your Apple Account or Google account password, your old phone’s passcode, and — critically — the login for your password manager and email. If your password manager unlocks with your face, great, but make sure you also know the master password, because the new phone won’t have your face yet.
- Do NOT factory-reset the old phone. Not today, not tomorrow. The old phone is your safety net and your reference copy. It stays intact, signed in, and charged in a drawer for at least two weeks — until you’ve lived on the new phone long enough to trust it.
iPhone to iPhone: Quick Start Is Genuinely Excellent
The easiest migration in consumer tech, if you let it run
Apple’s Quick Start has been around for years and it’s now remarkably close to cloning your phone. Turn on the new iPhone, place it next to the old one, and the old phone shows a “Set Up New iPhone” card. Tap continue, scan the swirling blue particle pattern with the old phone’s camera, enter your old passcode on the new phone, and you’re offered two paths: Transfer Directly from iPhone or Download from iCloud.
Take the direct transfer whenever you can. It copies everything device-to-device over a peer-to-peer connection: apps, photos, messages, settings, even the layout of your home screen. It’s slow — a well-used 256 GB phone can take over an hour — but it’s thorough. The iCloud download route is faster to get started but leaves apps re-downloading in the background for hours and depends on your backup being current and your iCloud storage being big enough to hold it. If you go that route, first force a fresh backup on the old phone: Settings > your name > iCloud > iCloud Backup > Back Up Now, and wait for it to actually finish.
After the transfer, expect a few stragglers. Apps re-download (your data comes with them, but the apps themselves come fresh from the App Store). Face ID and Apple Pay need re-enrollment — your face and your cards never transfer, by design. Your Apple Watch, if you have one, will need to be unpaired from the old phone and paired to the new one; it backs itself up to the old phone first, so your watch data survives. And some apps will ask you to log in again. That’s normal, and it’s a hint of what’s coming in the “never transfers” section below.
Android to Android: Cable First, Cloud Second
Two good methods, and the cable wins
Android-to-Android has quietly become very good, especially if you stay within one brand. You have three realistic routes.
The cable method (best). During setup, the new phone offers “Copy apps & data.” Choose it, and when given the option, connect the two phones with a USB-C cable (the one in the new phone’s box usually works, possibly with an adapter). The cable transfer moves apps, photos, videos, messages, call logs, and settings directly, quickly, and without depending on how healthy your Google backup is. On a Samsung-to-Samsung move, Smart Switch does the same job and goes further — it can carry over your home screen layout, settings, and even some app logins that a generic transfer won’t. Pixel-to-Pixel has its own similarly thorough flow built into setup.
The Google backup method (fine, with caveats). If the cable isn’t an option, the new phone restores from your Google account backup. Check that backup before you start on the old phone: Settings > Google > Backup — look at when it last ran and what’s included (apps, SMS, call history, device settings). Photos are a separate question: they live in Google Photos if you’ve had backup turned on there, so open the Photos app and confirm the backup status says complete before you trust it.
What to expect afterward. As with iPhone, apps re-download fresh, Bluetooth pairings are gone, and many apps — especially anything involving money or identity — will demand a fresh login. Budget an evening of “log back into things” before you declare victory.
Android to iPhone: Move to iOS, Used Correctly
Apple’s unglamorous app does the heavy lifting
Apple’s tool for poaching Android users is a plain little app called Move to iOS, and the single most important thing about it is when you use it: during the iPhone’s initial setup, on the “Transfer Apps & Data” screen. If you’ve already blown through setup and started using the iPhone, the option disappears, and your choices are to erase the iPhone and start over (Settings > General > Transfer or Reset iPhone > Erase All Content and Settings — safe to do when the phone is new and empty) or transfer things piecemeal. Do the erase. It’s worth it.
The flow: install Move to iOS on the Android phone, start setting up the iPhone until you reach “Transfer Apps & Data,” choose “From Android,” and the iPhone displays a code. Enter that code in the Android app, and the iPhone creates a temporary private Wi-Fi network that the Android joins. Then you pick what to move: contacts, SMS history, photos and videos, calendars, mail accounts, WhatsApp data (more on that below), and even free apps — the iPhone will grab the iOS versions of your free apps where they exist and add paid equivalents to your App Store wish list.
A few honest warnings. The transfer fails most often because something interrupts the Android phone — an incoming call, a battery-saver kick, a “smart” network switcher that hops back to mobile data. Put the Android in airplane mode, then turn Wi-Fi back on manually, and disable any setting called “switch to mobile data when Wi-Fi is weak.” Keep both phones plugged in and leave them alone until the iPhone says the transfer is complete — the Android may say it’s done earlier; believe the iPhone.
iPhone to Android: The Switch to Android App and the Cable
Google’s counter-move, strongest on Pixels and Samsung
Going the other direction, Google’s answer is the Switch to Android app on the iPhone, plus — again — the cable option during the Android phone’s setup. As with the other direction, the golden window is during the new phone’s initial setup: when it asks to copy data, connect the iPhone with a cable (a Lightning-to-USB-C cable, or the USB-C-to-C cord for iPhone 15 and later) and follow the prompts. The cable path moves contacts, photos, videos, calendars, SMS and iMessage history, and many apps’ data where the app exists on both platforms.
Two iPhone-specific chores make or break this move. First, turn off iMessage before you leave: Settings > Messages > iMessage off, and FaceTime off too (Settings > FaceTime). Skip this and your iPhone-owning friends’ texts will keep getting swallowed by Apple’s servers, delivered to a phone you no longer have — the classic “I switched to Android and stopped getting texts” complaint that has haunted people for a decade. Second, if your photos live in iCloud rather than on the device, the transfer can only grab what’s physically there. Google offers an official iCloud-to-Google-Photos copy tool (through privacy.apple.com and Google’s transfer service) that handles a full library migration in the background; start it days before your switch if your library is large.
WhatsApp deserves special mention in this direction: an official iPhone-to-Android chat transfer exists, but it works only over the cable during setup, on supported Android phones (Pixels, Samsung, and most recent devices), with the phone number staying the same. If WhatsApp history matters to you — and it holds years of family life for many people — plan the whole migration around it rather than treating it as an afterthought.
What Never Transfers Automatically (Handle These by Hand)
The short list that causes every horror story
Every phone-transfer disaster story traces back to this list. These items either don’t move at all, or move in a way that needs your participation. None of it is hard; all of it is easy to forget.
Two-factor authentication apps
This is the big one — the thing that locks people out of their own lives. Authenticator apps deliberately tie your codes to a specific device, because that’s what makes them secure. A normal transfer leaves your new phone with an empty authenticator and your old phone holding the only working codes. Each app has its own escape hatch:
- Google Authenticator: on the old phone, tap the menu > “Transfer accounts” > “Export accounts,” pick the accounts, and scan the resulting QR code with the new phone. Codes now live on both; remove them from the old phone when you’re ready.
- Microsoft Authenticator: enable cloud backup in the app’s settings (tied to your Microsoft account), then sign in on the new phone and recover. Work or school accounts may need re-enrollment through your organization’s portal.
- Authy: the easiest — multi-device is built in. Install it on the new phone, verify with your phone number, and your tokens appear after decryption with your backup password.
- Hardware keys and passkeys: security keys just work on the new phone (that’s their charm). Passkeys synced through iCloud Keychain or Google Password Manager follow your account, which is one more reason passkeys are replacing all of this.
If you use an authenticator with no export feature, the fallback is per-account: log into each service from a computer, temporarily disable 2FA or add the new device, and re-enable it. Tedious, but it works — as long as the old phone still generates codes. This is why the old phone stays unwiped.
Banking and finance apps
Banking apps deliberately treat a new device as a new device: expect fresh logins, device-registration text messages, and sometimes a call to the bank or a branch visit for investment and government-service apps. Budget apps that aggregate accounts will want you to re-authenticate every linked account. This is friction on purpose — you want your bank to be suspicious of a phone it’s never seen. Set aside an evening, keep the old phone nearby to receive verification codes, and knock them out one by one, most important first: primary bank, credit cards, payment apps, then everything else.
WhatsApp and other chat histories
WhatsApp’s history is end-to-end encrypted and lives on your device, not in Meta’s cloud, which is why it’s special in every migration:
- Android to Android: restoring from your Google Drive backup during re-install brings the chats back, as long as the phone number and Google account match. Force a fresh backup first: WhatsApp > Settings > Chats > Chat backup > Back up.
- iPhone to iPhone: same idea via iCloud backup, or simply included in a direct Quick Start transfer.
- Android to iPhone: supported inside Move to iOS — select WhatsApp in the transfer list and keep the same phone number.
- iPhone to Android: supported over the cable during Android setup on recent phones, same phone number required.
The recurring theme: the phone number is the anchor. If you’re changing numbers at the same time as changing phones, change the number inside WhatsApp (Settings > Account > Change Number) before you leave the old phone. Signal, Telegram, and iMessage each behave differently — Signal needs its own transfer flow between devices, Telegram syncs from the cloud automatically, and iMessage history rides along with Apple’s transfers and goes nowhere on Android beyond what the cable move captures as plain texts.
eSIM and your phone line itself
If your current phone uses a physical SIM, moving the line is as simple as moving the card — or asking the carrier for a new one. eSIM, now standard on US iPhones and most flagship Androids, is fussier. Newer iPhones can transfer an eSIM directly during setup (or via Settings > Cellular > “Transfer from Nearby iPhone”); Samsung and Pixel have similar carrier-dependent flows. But not every carrier supports every path, and cross-platform eSIM moves often require the carrier to push a fresh eSIM to the new phone — sometimes instantly through their app, sometimes with a call or a store visit. Sort this out early, because without it your new phone is a very nice iPod.
The odds and ends
A handful of smaller things reliably get left behind: Bluetooth pairings (car, earbuds, smartwatch — re-pair everything), saved Wi-Fi networks (Android-to-Android sometimes carries them; iPhone keeps them in iCloud Keychain), digital car keys and transit cards (re-add through the wallet apps), health data on some Android paths (export from your health app if it’s not cloud-synced), and — the one that surprises people — downloaded music and podcasts inside apps. The subscriptions follow your account, but the actual downloaded files don’t, so your offline playlists need to re-download on the new phone before your next flight.
| Data type | iPhone → iPhone | Android → Android | Cross-platform |
|---|---|---|---|
| Photos & videos | Full (Quick Start) | Full (cable or Google Photos) | Cable/app move; iCloud libraries need the Google Photos transfer tool |
| Contacts & calendars | Full | Full via Google account | Full via Move to iOS / Switch to Android |
| Texts & call logs | Full, including iMessage | Full via cable or backup | Supported both directions; disable iMessage when leaving iPhone |
| Apps | Re-download, data intact | Re-download, most data intact | Free apps matched where they exist; app data rarely survives |
| WhatsApp chats | Full | Full via Drive backup | Yes, via official flows; same phone number required |
| Authenticator 2FA codes | Never automatic — export/recover per app, every time | ||
| Banking apps | App moves; login and device registration never do | ||
| eSIM / phone line | Often transferable in setup | Carrier-dependent | Usually needs the carrier to issue a fresh eSIM |
The Final Checklist, in Order
Print this mentally before the wipe
- 1. Old phone: update software, charge it, connect to Wi-Fi, force a fresh cloud backup (iCloud or Google), and a fresh WhatsApp backup if relevant.
- 2. New phone: run the transfer during initial setup — Quick Start, cable copy, Move to iOS, or Switch to Android. Don’t improvise mid-setup.
- 3. Sort the phone line: move the physical SIM or get the eSIM provisioned and confirm calls and texts work on the new phone.
- 4. Transfer your authenticator app using its export or recovery flow, and generate a test code before touching anything else.
- 5. Log into banking, email, and your password manager; re-register devices where asked.
- 6. Verify WhatsApp chats came over; if leaving iPhone, confirm iMessage is off and friends’ texts arrive as SMS.
- 7. Scroll your photos back to the oldest year and spot-check that the library is genuinely complete, not “still syncing.”
- 8. Re-pair Bluetooth devices, re-add wallet cards and transit passes, re-download offline music and maps.
- 9. Live on the new phone for one to two weeks with the old phone intact in a drawer.
- 10. Only then: sign out of your accounts on the old phone, factory-reset it (Settings > General > Transfer or Reset on iPhone; Settings > System > Reset options on Android), and remove it from your Apple or Google account’s device list.
None of this is difficult, and modern transfer tools have removed most of the guesswork. The disasters all come from the same two mistakes: assuming the cloud had a copy of something that lived only on the device, and erasing the old phone before the new one had proven itself. Keep the old phone alive a little longer than feels necessary, and the worst case of your upgrade is a boring success story — which is exactly what a phone migration should be.
Menu paths reflect iOS and Android versions current as of August 2026 and can shift slightly between updates and manufacturers (Samsung in particular rearranges its Settings app regularly). Carrier eSIM transfer support varies by provider and plan.